I've meant to write this post for over a year now (that's right, much longer than this blog has even existed!) In many ways, this is the motivation to actually set up the blog in the first place.

Before it was a gift though, it was a plan. And the problem with that plan was that I couldn't find a good cuttlefish pattern. There were some out there, but they were not what I was looking for for one reason or another. I said to myself, "Cuttlefish are not that crazy looking, I bet I could make up a pattern." So I did. It took a few tries on some parts, particularly the tentacles and arms. (I had to learn that there was a difference and that cuttlefish have both).
So without further ado, here is the pattern as I recorded it a year and a half ago:

In case you can't read my handwriting, here is what it says:
Body: 4, 8, 12, 16, 16, 16, 18, 18, 18, 20, 20, 20, 22, 22, 22, 24, 24, 24, 20
Face: 5, blo 10, 15, [ sc 3, tentacle, arm x 8, tentacle, sc 2] 15, [ch5, 3bauble x 2, ch1, 3bauble x 2, ch 5] 15
Tentacle = ch 10, sl2, sc3, hdc 4
Arm = ch10, sl 10
Not helpful? Yeah, I thought not. Using the cuttlefish itself and my notes, I have deduced what past me did, and here it is in a more useful format. Once you see how it works, my notes are actually not that crazy. Basically all I did was write down the final stitch counts for each row and remembered that I was increasing from the sides on the body.
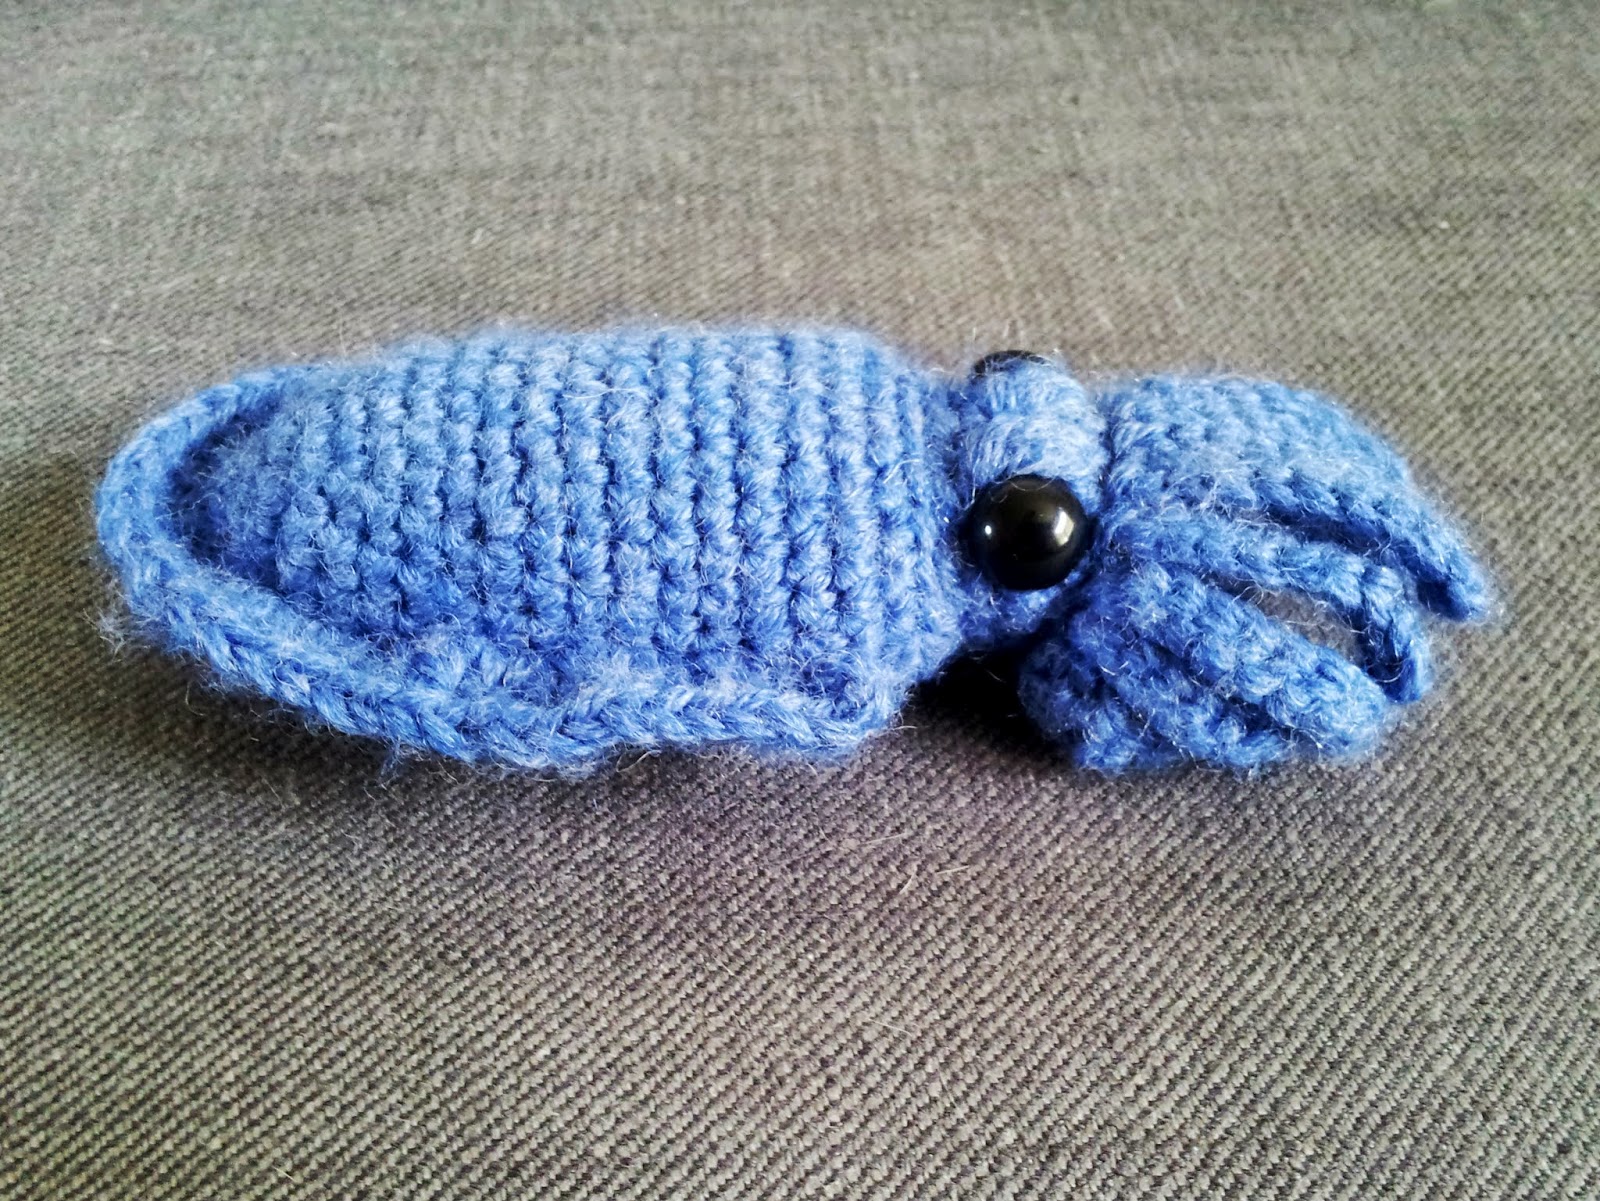
Little Cuttlefish:
The example cuttlefish was done using a 4.00 mm (US G6) hook, blue Worsted Weight Lion Brand Wool Ease, and 3/8 inch safety eyes. You will also need a tapestry needle (to sew the head onto the body) and some sort of stuffing. Feel free to use a different hook, yarn, or eyes if you prefer.
The example cuttlefish was done using a 4.00 mm (US G6) hook, blue Worsted Weight Lion Brand Wool Ease, and 3/8 inch safety eyes. You will also need a tapestry needle (to sew the head onto the body) and some sort of stuffing. Feel free to use a different hook, yarn, or eyes if you prefer.
I use the notation "[some stitches] x 3" to mean repeat the [some stitches] three times. Here are other abbreviations that I am using:
sc = single crochet
inc = increase (two single crochet in the same stitch from below)
ch = chain
sl = slip stitch
blo = back loop only single crochet. This should leave an extra bar on the outside of the critter.
hdc = half double crochet (yarn over, hook though stitch, yarn over, pull through, yarn over, pull through all three loops)
3bauble = Basically you will do three double crochets that all go into the same stitch, and then are closed off with a single, final pull-through. I guess that is [y/o, hook through stitch, y/o pull through, yarn over, pull through 2 of the loops, leaving two on the hook] x 3 y/o pull through all four loops at once. This should make a bit of a bump but won't be an increase or a decrease. This video I just found does a much better job of explaining it:
The body and head are done in the round, and I like to start with a magic loop.
Body:
The trick here is that your increases should be coming from the sides, not spread evenly as you would for a sphere; we're trying to make a creature that is shaped more like an almond than a ball. The body should be worked in the round.
row 1: Using magic loop, sc 4 (4 stitches total)
row 2: inc in each sc from row 1 (8)
row 3: [inc, sc 2, inc] x 2 (12)
row 4: [inc, sc 4, inc] x 2 (16)
row 5-6: sc 16 (16)
row 7: inc, sc 6, inc, sc 8 (18)
row 8-9: sc 18 (18)
row 10: inc, sc 7, inc, sc 9 (20)
row 11-12: sc 20 (20)
row 13: inc, sc 8, inc, sc 10 (22)
row 14-15: sc 22 (22)
row 16: inc, sc 9, inc, sc 11 (24)
row 17-18: sc 24 (24)
row 19: [dec, sc 8, dec] x 2 (20)
bind off
Fringe: Work slip stitches along the surface of the body about where your increases are coming from. I had to kind of take what I could get as far as keeping it straight and even. I used the last row of 24 as my starting and ending point. Once you have a base of slip stitches to work from, double crochet one row all the way around. For my fringe I did about 1 double crochet per slip stitch, but if you want a more ruffly fringe you should do more. 3-5 double crochet per slip stitch would be much more ruffly.
Head:
This will be a more traditional circular increase but one of the rows is going to be a whole bunch of tentacles. When that happens you will be chaining off into the abyss and then working your way back to form the tentacle/arm. Working in the round again
row 1: Using magic loop, sc 5 (5)
row 2: blo 2 in each sc from previous row (10)
row 3: [inc, sc 1] x 5 (15)
row 4: sc 4, <tentacle>, <arm> x6, <tentacle>, sc 3 (15)
row 5: sc 15 (15) When you get to the tentacles/arms, work into the back loops of row 3, making sure the arms are on the outside of the critter.
row 5: sc 15 (15) When you get to the tentacles/arms, work into the back loops of row 3, making sure the arms are on the outside of the critter.
row 6: sc 5, 3bauble x2, sc 1, 3bauble x 2, sc 5 (15)
row 7: sc 15 (15)
bind off
<tentacle>: chain 10 out away from the head. Then turn and work back: sl 2, sc 3, hdc 4, once you get back to the head, slip stitch to the front loop only of the stitch you would have been working into if not for the tentacle. The back loop will be left for the next row to work into. This whole thing should use one stitch from the row below but leave a long tentacle hanging off.
<arm>: chain 10 out and slip stitch 10 back with the last one being into the row below.
Use safety eyes and attach them on the outside of the bumps created by the pairs of baubles. I put mine between the two baubles but you can feel free to put them wherever looks the cutest. Once the eyes and fringe are in place, stuff both parts and sew the head onto the body.
That's it! While I have crocheted a number of things without a pattern, this is the first time I've tried to formalize my ad-libbing into a pattern someone else could follow. Let me know if you find any mistakes and post pics of your FOs!
No comments:
Post a Comment